This would have been my reaction if you had asked me about pot-stickers 1 year ago. I first tasted them when J took me to this restaurant that specializes in mock-meat entrees. I hated the place! Being a hard-core vegetarian all my life, I could not swallow the kung pau chicken/hunan beef even though I knew it was vegan!!! And, I was certain their vegetable soup contained some animal blood!! Add to my misery the next table had ordered - Duck roast! Oh lord, that was enough to make me nauseous! I wanted to run but did not want to spoil it for J- the guy was all into the beef thingy!! Strangely though we left soon after-even before the lady in the next table had finished half her duck. J later told me that I looked as if I would puke any minute and he did not want a scene!! If this makes you think that it was our last visit to that place - you are wrong! We were there the following weekend, ordered the same thing but 1 small change- I licked my plate clean!! Yep, I was hooked (thats in bold, underlined and in capitals!!). I'd discovered my inner carnivore- roar?!
I don't think I can recreate their chicken/beef/duck entrees, but I searched around and experimented and finally we have what we think is a tasty pot-sticker recipe. And here it is just for you, step-by-step.
Pot-stickers:
Wonton wrappers (available at your local grocery store)
3.5-4 cups chopped spinach ( I have seen recipes with mushrooms/cabbage, you can use those instead of spinach)
1/4 cup Nutrela soy granules (to resemble pork chops-rrroarr! I bought this in the Indian store)
2 garlic cloves, finely minced
1 Tbsp soy sauce
pinch of salt
1 Tbsp oil
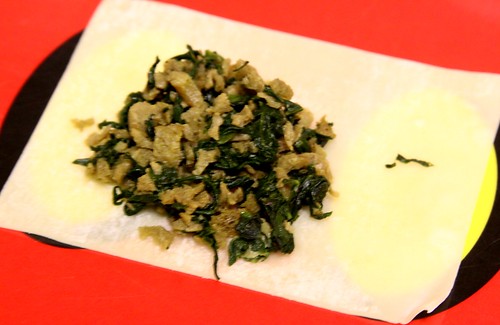
Cook the soy granules according to the instruction on the packet and set aside. Heat oil in a pan add the garlic and let it turn light brown. Add the spinach and saute till its kinda dry and cooked. Now add the soy granules, soy sauce and salt mix well. It should be completely dry. Something like this,

Now comes the part I am not fond of- filling the wontons. Well, thats what husbands are for- don't you agree? Now take a wonton wrapper and put 1 spoon of the filling. Brush the sides of the wrapper with little water and fold it in half, sealing the edges.

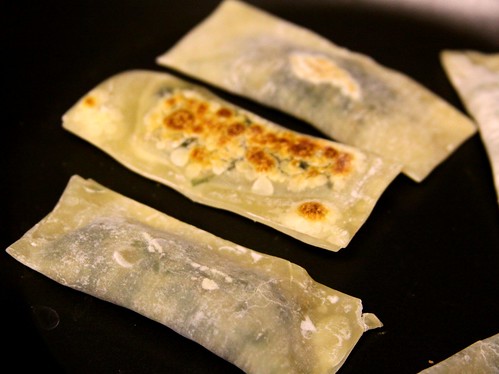
Heat a non-stick pan and just lightly grease it. Place the filled wontons in the pan and allow it to brown on one side.
Don't flip, just add 1/2 cup water and cover the pan. This will allow the wontons to steam.
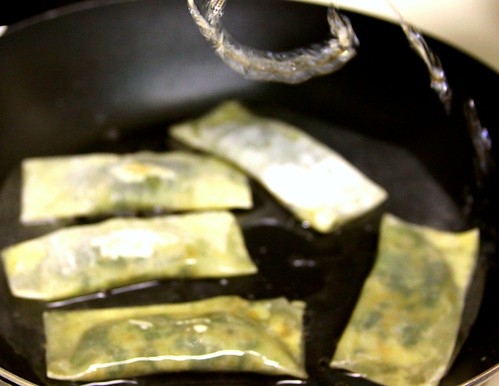
After 5-7 mins, take a peek to see if the water has evaporated (you want all the water to be gone). Remove the lid and cook till the wontons re-crisp. Set aside.
It should look something like this,

If your wontons don't look shrink-wrapped and look puffy instead, it really does not matter- its the taste that counts!
We are now ready to serve,
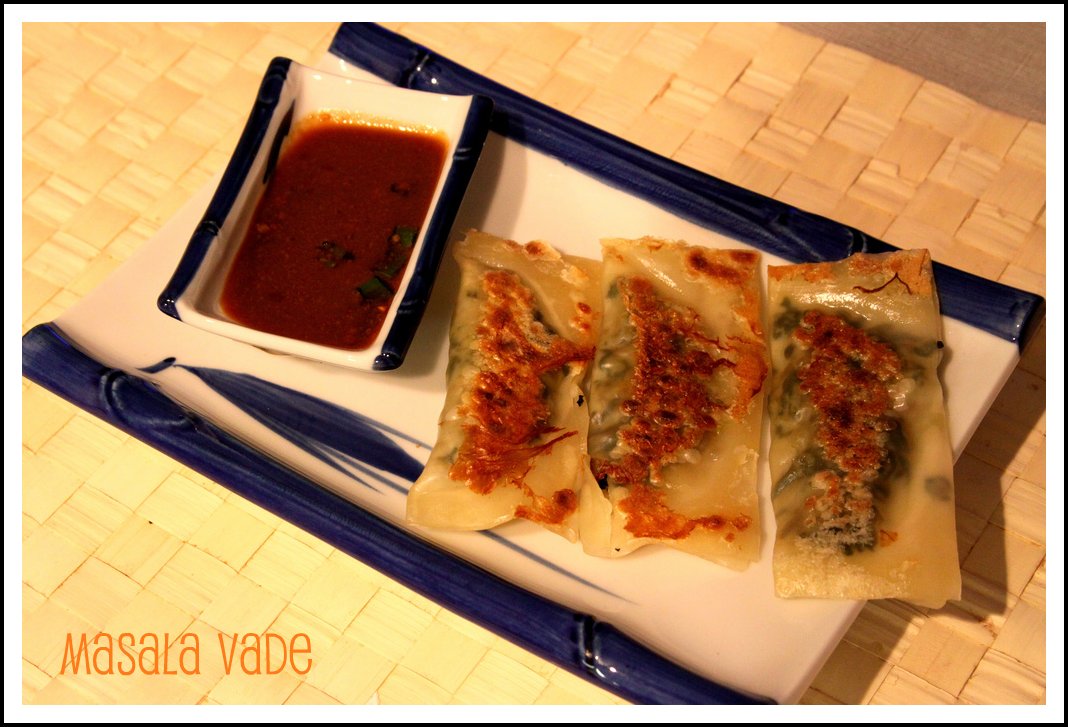
The dipping sauce is simple to make, just mix 1 tsp peanut butter, 2 Tbsp soy sauce, 2 Tbsp water, 1/2 tsp grated ginger, 1 finely chopped dry red chilli, 1 tsp chopped cilantro. Mix well and set it aside in the refrigerator for an hour-this allows the flavours to mingle!
How to eat it? Well, take a pot-sticker, dip it in the sauce and say Ahhhhh...... You must taste the soft yet chewy wrapper, savoury filling and bit of the crunchy bottom! This was our dinner last night, light yet tasty. We ate it watching "As time goes by" on Netflix...I love Saturdays!
When the read your post's title I thought it was going to be about "herbal refreshments"...ahem.. I did get my hopes high..lol, but I liked your recipe:))
ReplyDeletegreat pics and love the detailed instructions:)
@Ranjani
ReplyDeleteHerbal refreshments?? The only herbaly thing I use are shampoos! Oh thanks for saying good things about my pics and recipe *blush**blush*
Hey SJ, regarding the questions you posed to me on my Paratha video:
ReplyDelete1) I use golden temple atta- make sure that you use warm water when kneading your dough as well as a drop of oil, and you'll need a splash more than half cup of water for one cup of flour. Your flour needs to be fairly soft and supple but not sticky. Let it rest for atleast 10 minutes covered with a damp tea towel before you start using it.
2) if you make sure that your aloo stuffing is very finely mashed (you can even grate it. it'll ensure that's its smooth and lump free) and then you make them into tight balls that are much smaller than the rolled out parantha, it'll be easy to wrap the dough around the stuffing like a pouch. Then make sure to press down ince you've wrapped it and dust it with flour. You can let it rest for 5-6 minutes before rolling it out into a paratha, and you'll be sure to get a paratha with no overflowing stuffing. Make sure that you roll your parathas evenly on all sides, keep turning it to make sure that they are evenly thick.
3) Yes I do use butter for my parathas, because it makes them melt in my mouth! just make sure you indulge ever now and then, and hit the gym regularly:)
I wish I really was stick thin...but the video only shows my upper half...and let me just tell you, my hips don't lie:)) I do a LOT of cardio though(run almost everyday)...so it helps.!
Sorry for leaving this long comment...but I hope it was helpful!
I also wanted to add one more suggestion!
ReplyDeleteYou could sandwich the stuffing b/w two rolled out rotis press the edges of the roti together and roll it out as well...it might help too! atleast initially..and soon you'll be on your way to becoming a paratha pro!
Thanks for ur comments and stopping by! This recipe looks new and interesting, nice step by step pics!
ReplyDeleteNice - what a chic looking appetizer !!!
ReplyDeleteI love it!